
To use CapCut for Instagram Reels, open a new project, import your clips, and set the canvas to 9:16. Trim and arrange the footage before you generate captions. For a full-screen vertical Reel, start with a 1080p export and check the saved file on your phone before uploading it to Instagram.
On this page
Start a vertical CapCut project
On mobile, open CapCut, tap New project, choose your source clips, and add them to the timeline. Look for Aspect ratio, Ratio, or Format in the editor toolbar and choose 9:16. On desktop, start a project, use Import, drag the clips onto the timeline, and look for the ratio control beneath the preview. The toolbar labels and placement can vary by version. CapCut’s desktop ratio walkthrough shows the project control and export dialog.
Setting the ratio early gives you a vertical preview while you decide which parts of each clip to keep. A wide shot of a person holding a product may crop neatly when they stand in the middle. The same framing can cut off their hand when they reach for something at the edge. Scrub through the entire clip after positioning it, especially when the camera or subject moves.
When a crop hides an action the viewer needs to see, split the clip around that action and give the new segment its own framing. For footage that needs the whole width, such as a recording of a wide spreadsheet, fit it inside the vertical canvas and add a closer insert for the part viewers need to read. Use the Instagram Reels size guide to check how the finished video and cover will fit across Instagram placements.
Trim a Reel around one clear action
Suppose you want to make a 20-second Reel for a ceramic mug with an oversized handle. You have a shot of the finished mug, a close-up of the grip, footage of coffee pouring, and a still shot for the final line. Each clip has a job. Put the finished mug first so someone who sees the video in their feed knows what they’re looking at before you explain the handle.
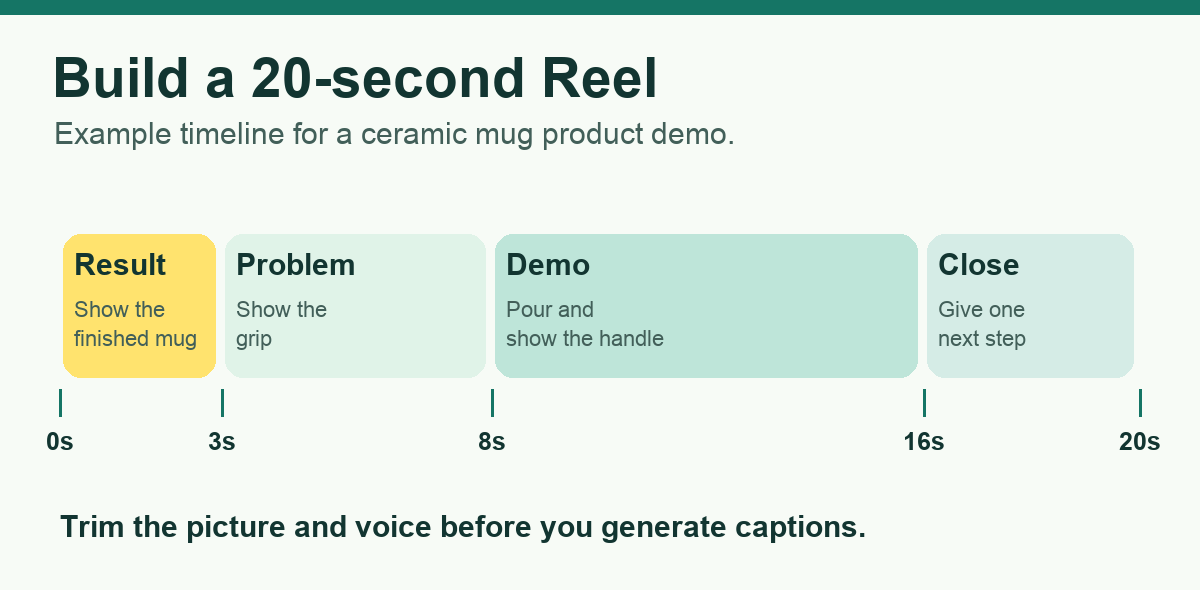
| Time | What the viewer sees | What to check in CapCut |
|---|---|---|
| 0–3 seconds | Finished mug in hand | The mug is visible on the first frame |
| 3–8 seconds | Close-up of the handle and grip | The crop leaves room for the fingers |
| 8–16 seconds | Coffee pour followed by a clean shot of the hold | The cut preserves the start and finish of each action |
| 16–20 seconds | Still mug with one short next step | Give viewers time to read the final line |
Drag clip ends inward to trim the setup and the moment after each action. For a pause inside a clip, put the playhead at the start of the pause, split the clip, and split again where the action resumes. Remove the middle segment. Play back the cut to make sure a hand or object doesn’t appear to jump in a distracting way. A cut to a close-up can give that jump a reason if you also need to show more detail.
Listen with headphones before adding music. If the pour makes the spoken explanation hard to hear, lower that clip’s sound or use the voice recording over the pour. Keep a bit of the pour if it helps the viewer understand what they’re seeing. After adjusting the mix, play the middle of the video on your phone speaker. A voice that sounds clear through headphones can be harder to follow on a small speaker.
Generate and repair CapCut auto captions
Once the cut is close to final, open Captions, choose Auto Captions, and select the language spoken in the clip. Where CapCut offers an audio-source control, select the track you want transcribed. Generate the captions and check that they appear on the timeline. Some versions place the feature under Text. CapCut documents the differences between its mobile, desktop, and browser editors in its auto-caption help guide.
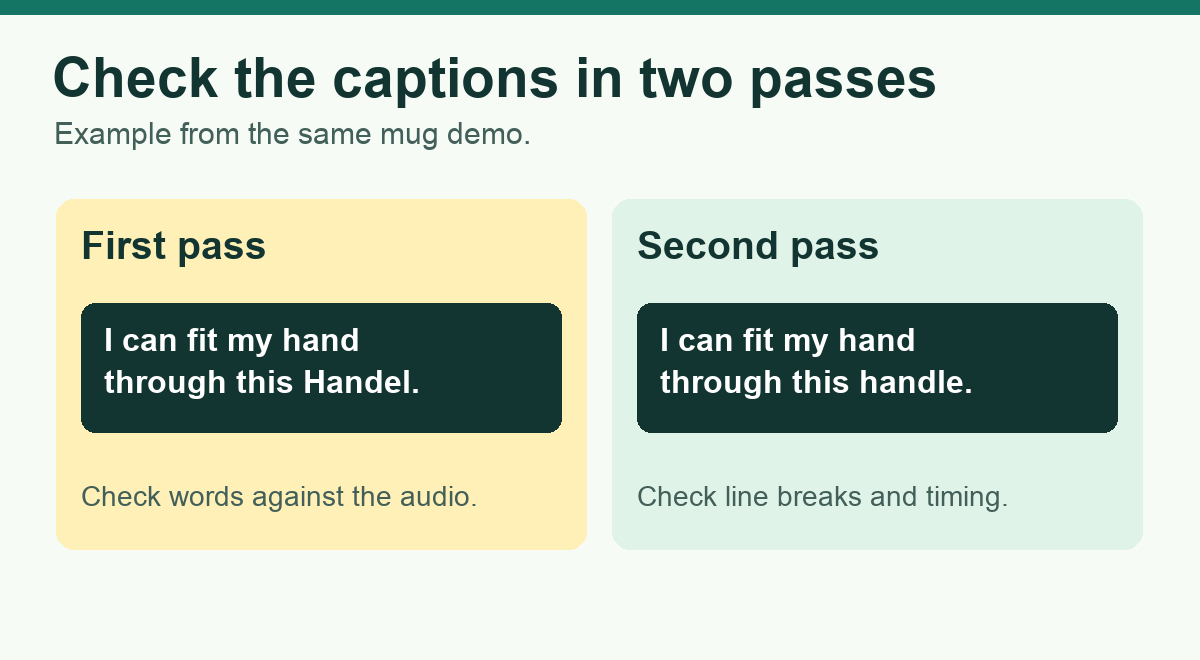
Review the text against the audio first. Product names, measurements, and numbers deserve a close listen. In the mug example, a caption could turn “this handle” into “this Handel.” A viewer watching without audio has no way to hear the intended spelling, so tap or select the caption segment and correct the words. If you remove a sentence from the edited video, review the corresponding caption segments before you export.
Watch the Reel again and review timing and placement. A caption should appear when the corresponding phrase starts and stay on screen long enough to read. When an automatic line break splits a phrase awkwardly, shorten the visible line if you can preserve what the speaker said, or adjust where the caption wraps. If a word is readable against one shot but disappears against the next, add a dark backing to the text or choose a cleaner part of the frame. Keep captions inward from the bottom and right edges so Instagram’s interface has room.
For a silent demonstration, you can add short text labels directly to the timeline. In the mug demo, “Room for four fingers” can appear as the grip comes into view. Put the text on the shot that shows the claim. If adding music late, compare the new mix against the edited narration before you regenerate captions. You can keep the corrected caption track when the speech timing stays the same.
When a CapCut template makes sense
Templates work well when you have the right number of shots and the preset gives each shot enough time to read. For example, a 9:16 Reel template on CapCut specifies four clips. Check the clip count and ratio before bringing in your footage, then preview how the shortest slot treats the most detailed shot. A clip that needs viewers to read a product label may need more time than the preset offers.
Try a regular project when the narration sets the pace or every cut has to follow an action. You can then hold the grip shot for the full explanation and tighten the opening or closing clip if the edit runs long. If a template includes a soundtrack, review the track’s license for your intended Instagram use before exporting it. Keeping a voice-only version gives you a clean file if you plan to choose audio inside Instagram.
Choose CapCut export settings for Instagram Reels
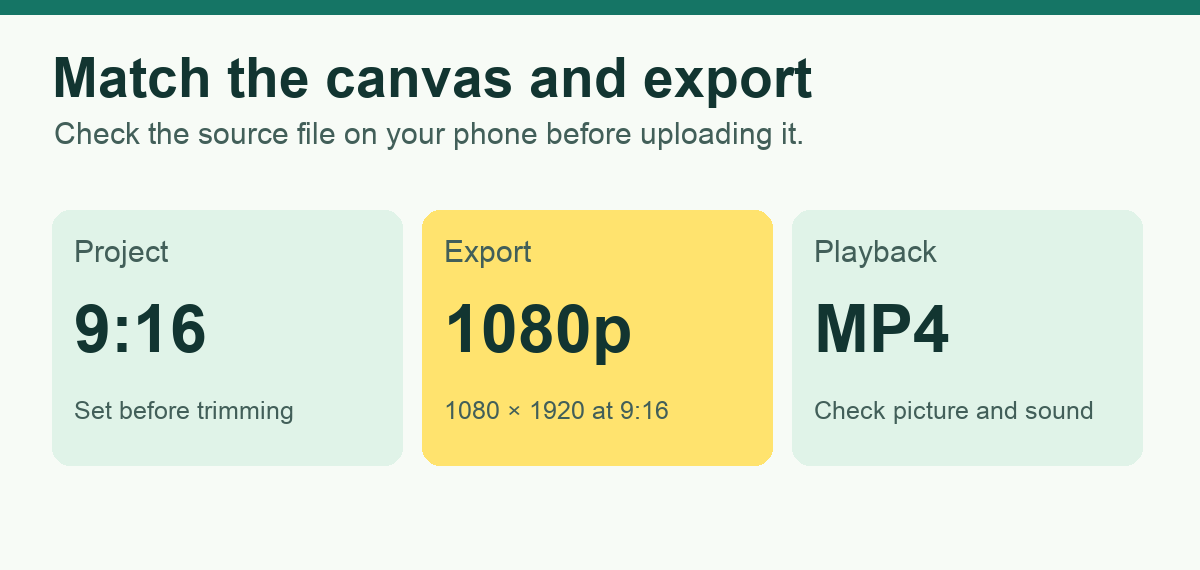
Open Export on desktop. On mobile, look for the resolution label near the export button and open the settings before rendering. For a 9:16 project, choose 1080p and confirm the saved file is 1080 × 1920. Choose MP4 where the editor offers a format selector. For footage recorded at 30 frames per second, start with a 30 fps export. If your footage was shot at 60 fps and you need to retain the motion, review the resulting file at that setting. CapCut’s export documentation notes that the available options depend on the device, source, and editor.
- Name the export so you can pick it out on your phone, such as mug-handle-reel-v3.mp4.
- Play the saved file in your phone’s video player. Check the first frame, one middle caption, and the last second. Turn the sound on and listen for the voice track.
- Load the file into Instagram’s Reel composer. Check the preview for cut-off text, pick the cover, and inspect the profile crop if the option appears.
- Save the CapCut project alongside the final file so you can fix a caption or reframe a shot without recutting the Reel.
Export the video itself when you want the captions to appear as part of the picture. An SRT is a separate subtitle file. If you choose a caption-only export, you’ll have a subtitle file to reuse elsewhere, and you still need to render the MP4 for Instagram. CapCut’s subtitle export help explains where it offers that separate export.
Fix the export before you post it
If you see black bars in the local file, reopen the project and confirm the canvas ratio, then select the clip and inspect its scale and position. A 9:16 canvas can still contain a wide clip with unused space above and below. Reframe it if the subject fits, or design the space around the wide shot so the viewer can read the context. For a video that uses one vertical shot and one wide insert, check both clips before changing the whole canvas.
If one caption disappears, play the exported file and compare the same timestamp in CapCut. A subtitle segment may start late, end early, or sit outside the visible frame after a ratio change. If all captions disappear, check that their track is visible in the preview and render a short test version with video export enabled. If you changed only one spoken line, correct or replace the caption for that line and leave the other approved captions in place.
If the export looks soft in both CapCut and the phone player, inspect the original clip at the same timestamp. A heavy crop gives the editor fewer source pixels to work with, even if you ask for a larger export. Scale back the crop, replace the clip with the original camera file, or put a sharp detail shot over that part of the narration. If the original export looks fine but a transferred copy doesn’t, transfer it again as an original file.
Frequently asked questions
Can I edit Instagram Reels in CapCut on a computer?
Yes. Import the clips in CapCut Desktop, drag them onto the timeline, and choose 9:16 from the ratio control. You can render the edited video and transfer the file to your phone.
What ratio should I select in CapCut for Instagram Reels?
Choose 9:16 for a full-screen vertical Reel. On a 9:16 canvas, a 1080p export should measure 1080 × 1920 pixels.
Should I use a CapCut template for every Reel?
Use a template when its clip count and pace suit your footage. For a narrated demo, a regular project gives you control over how long each shot stays on screen.
Can I add auto captions in CapCut on my phone?
Open Captions, choose Auto Captions, and select the spoken language. Review every line for errors and check when it appears in playback.
Why do I have an SRT file but no Reel video?
You exported the captions as a separate file. Run a video export to make an MP4 and play it to check that the text appears in the picture.
How can I remove black bars from a CapCut Reel?
Confirm the project is set to 9:16, then select the clip and adjust its scale and position. Play the full clip to make sure reframing keeps the subject in view.